How To Run Batch Jobs On DigitalOcean

DigitalOcean offers wide range of servers which are quite powerful. However DigitalOcean doesn’t offer batch jobs service where you can define and run a set of jobs. Don’t fret, Daestro supports multiple cloud providers to run jobs on including DigitalOcean. In this guide we will see how to run batch batch jobs on DigitalOcean using Daestro.
Prerequisites
- Daestro account: If you don’t have one, you can sign up here
- DigitalOcean account: If you don’t have one, you can sign up at their website
DigitalOcean API Key
In order to use your DigitalOcean account on Daestro, first you will need the API key from DigitalOcean, which Daestro uses to launch servers on your behalf to run jobs on.
Log in to your DigitalOcean account.
Go to API page from the sidebar
On the “Tokens” page, click the Generate New Token button.
Configure your new token:
- Token name: Give your token a descriptive name that you’ll recognize later, like
daestro-integration-token. - Expiration: It’s highly recommended to select No expire. This ensures that Daestro can continue to manage your resources without interruption.
- Select scopes: Scopes define what the token is allowed to do. You must assign the correct permissions for Daestro to function correctly.
- Give Read, Write, Update and Delete access to the following scopes:
DropletBlock StorageBlock Storage ActionBlock Storage SnapshotFirewallVPCVPC Peering
- Give Read-only access to the following scopes:
AccountImageRegionssizes
- Give Read, Write, Update and Delete access to the following scopes:
- Token name: Give your token a descriptive name that you’ll recognize later, like
After selecting the scopes, click the Generate Token button at the bottom of the page.
Important: Copy Your Token! DigitalOcean will now display your new token. This is the one and only time it will be shown. Copy the token and store it in a secure password manager. If you lose it, you will have to generate a new one.
Create Cloud Auth in Daestro
- Login to your Daestro account
- Go to Cloud Auth then Add Cloud Auth page.
- Select DigitalOcean from the given Options
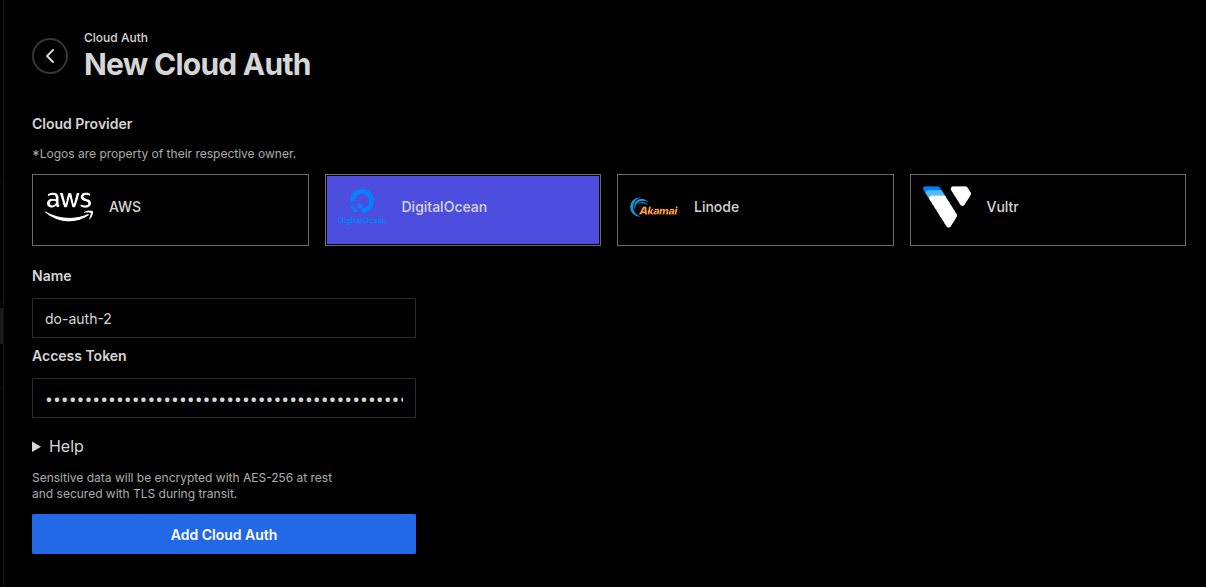
Daestro Console: Add New Cloud Auth - Give it proper name
- Add the API Access token that we got in previous step
- You can save Cloud Auth by clicking on “Add Cloud Auth” button
Compute Environment
Let’s define the instance type that we want to run our job on. We do that by creating a compute environment.
- Go to the Compute Environments page in Daestro Console
- Click on the “Add New” button
- Select your Cloud Auth
- Select the Instance Family then Instance Type that you want to run your job on
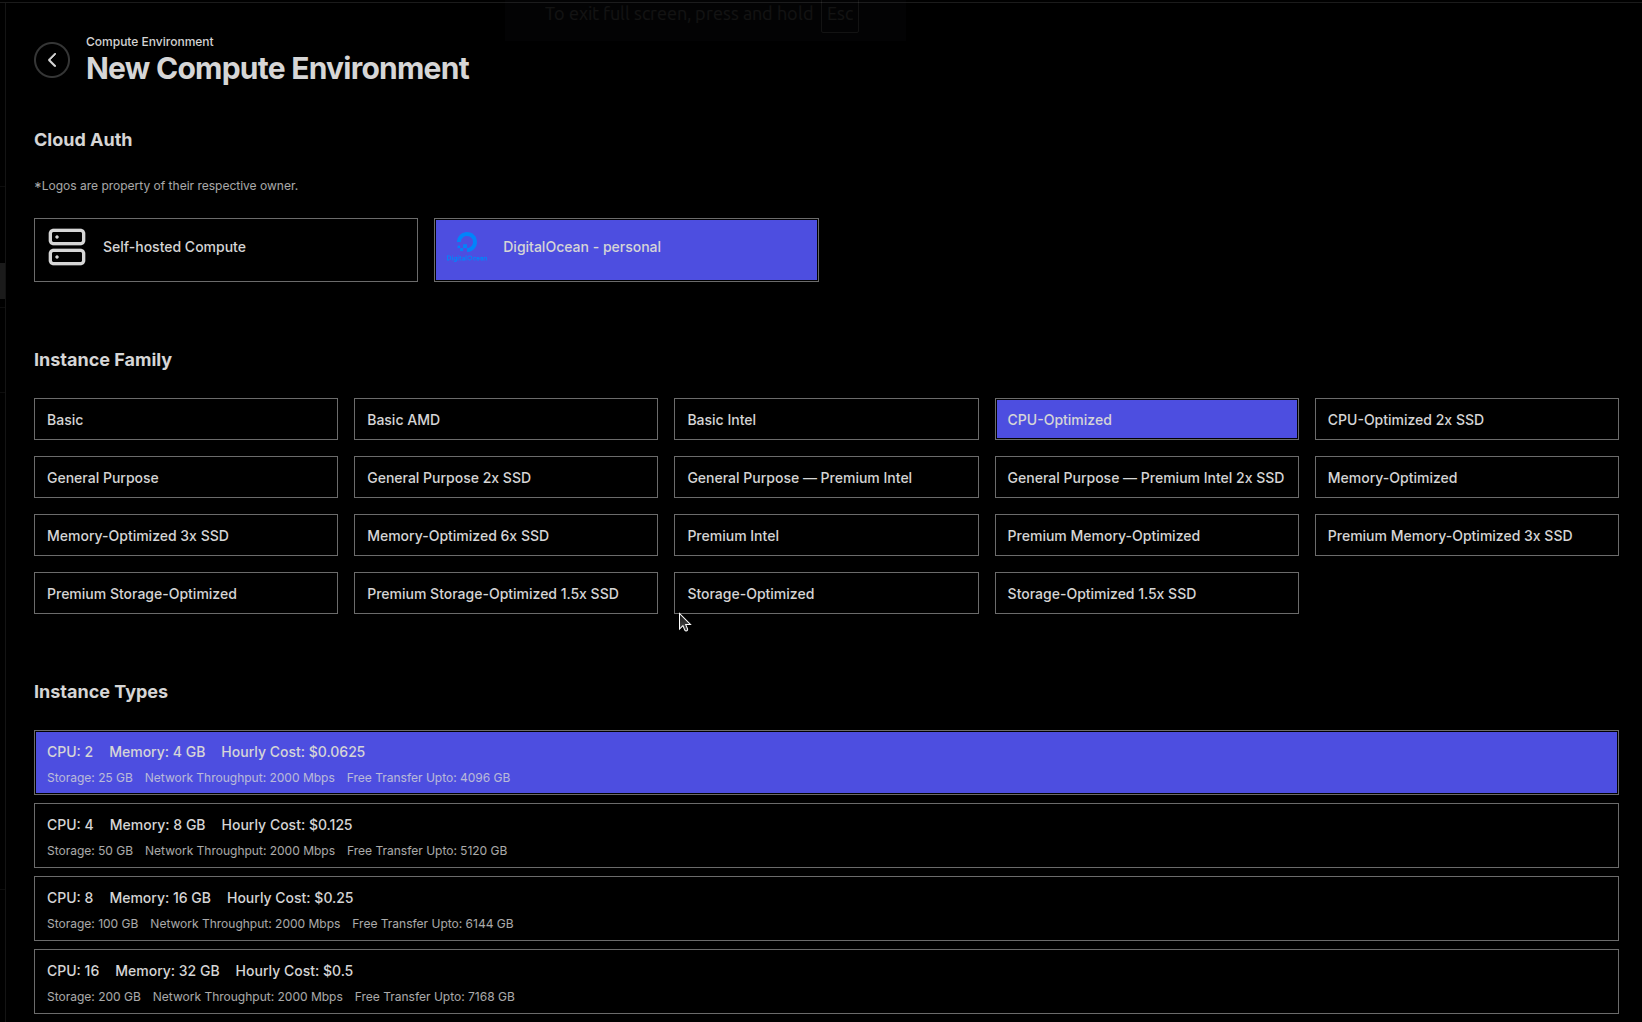
Daestro Console: Add New Compute Environment - Give this compute environment a name, e.g. “DO-2-cpu-optimized”
- Click on the “Add Compute Environment” button
Job Queue
Job queues define how and when jobs are executed.
- Go to the Job Queue page in Daestro Console
- Click on the “Create Job Queue” button
- Fill in the details and click on the “Create Job Queue” button
- After job queue is created, add the compute environment to the job queue
Job Definition
Job definition is the blueprint for the job. Here we define the docker image that we want to run and all the attributes to the container that we want to pass on.
- Go to the Job Definition page in Daestro Console
- Fill in the details for the job definition
- Click on the “Create Job Definition” button
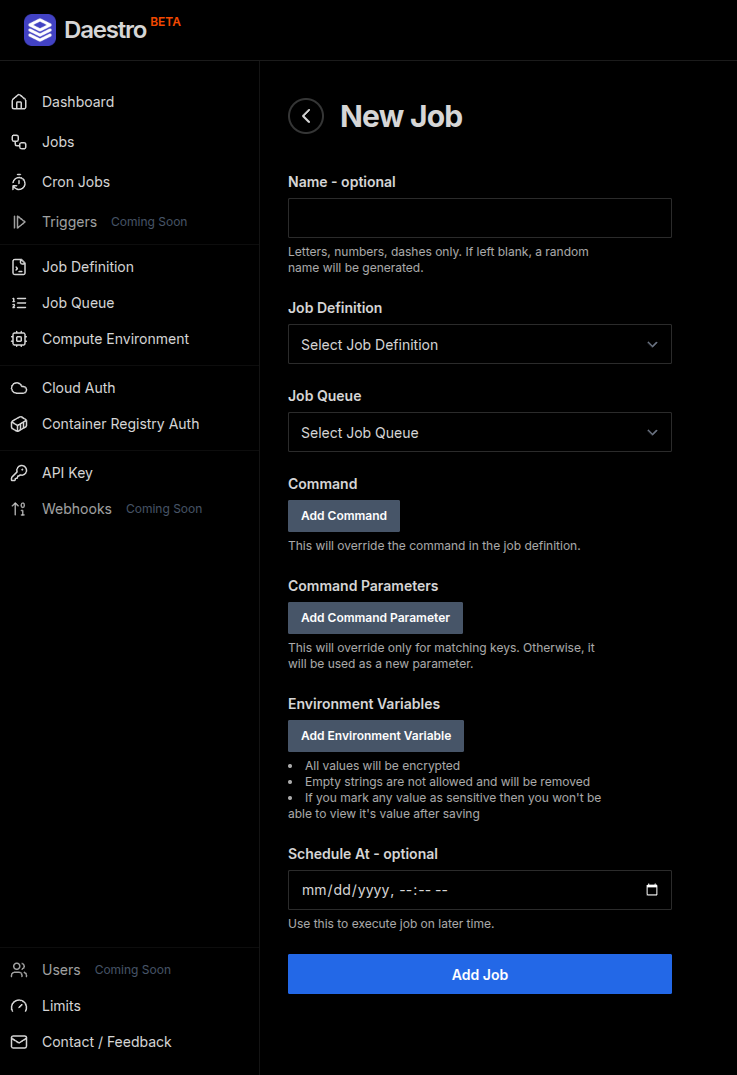
Running Job
You can submit jobs either from Daestro Console or use the API .