How To Run Jobs On Your Self-hosted Compute

Ever wished you could use a powerful container orchestration platform to run tasks (i.e. batch jobs ) on your own hardware? Maybe you have a beefy desktop PC, a server humming away in a closet, or just your trusty laptop. With Daestro, you can connect your own machines to its platform and start sending jobs to them. This feature is called “Self-hosted Compute,” and it offers incredible flexibility.
Let’s walk through how simple it is to set this up.
What is Self-hosted Compute, Anyway?
In simple terms, it means you can use Daestro to run jobs on your own computers. While Daestro is great at managing servers on cloud providers like AWS (see Daestro vs AWS Batch ), DigitalOcean, Vultr, etc., it can also direct work to your personal hardware. You manage the machine itself, and Daestro handles sending it jobs to execute.
Step 1: Create a “Self-hosted” Compute Environment
First, you need to tell Daestro about your machine. You do this by creating a special “Compute Environment,” which is like a template for your servers.
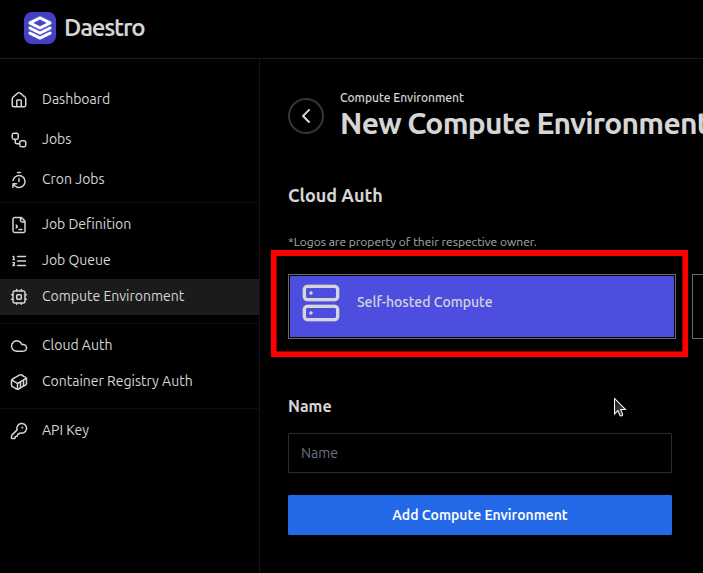
In the Daestro Console, go to the Compute Environment page and add a new one. In the Cloud Auth list, you’ll find a special option called “Self-hosted Compute”. All you have to do is select it and give your new environment a name.
Step 2: Get Your Authentication Token
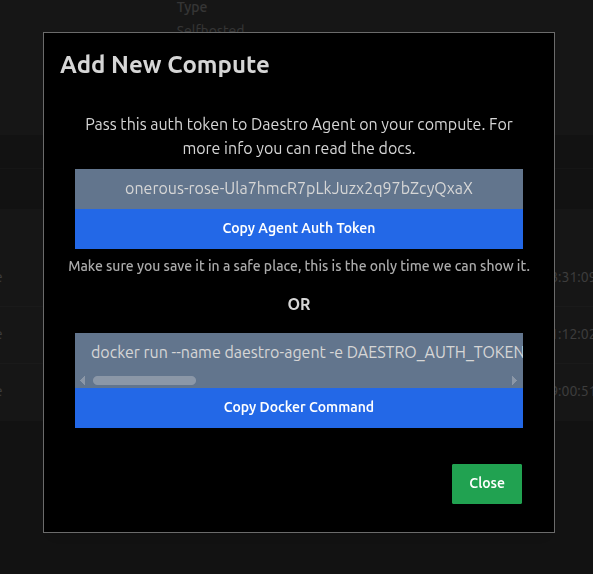
Now that you have an environment, you need a way to link your physical computer to it. This is done by creating a Compute Spawn inside the environment you just made. When you do this, Daestro will generate a unique Auth Token. This token is used to authenticate with Daestro. Keep it safe.
To create Compute Spawn , go to Compute Environment that you’v created. On the Compute Spawn section you’ll see “Add New” button. Click on this button then choose the Job Queue that you want to associate with this. Your Agent Auth Token will be generated.
Step 3: Run the Daestro Agent on Your Machine
The final piece of the puzzle is the Daestro Agent. This is a program you run on your computer that communicates with the Daestro platform to get jobs.
The easiest way to run the agent is with Docker. You’ll use the Auth Token from the previous step to start the agent. Once the agent is up and running, it will connect back to Daestro, and your machine will be ready to go. It will sit in an “idle” state, waiting for you to send it a job.
The Docker Command
Here is the command you’ll use to run the Daestro Agent. You’ll need to replace <AGENT_AUTH_TOKEN> with the token you generated in Step 2.
docker run --name daestro-agent -e DAESTRO_AUTH_TOKEN="<AGENT_AUTH_TOKEN>" -v /var/run/docker.sock:/var/run/docker.sock -v daestro_agent_data:/var/lib/daestro-agent --network host daestro/daestro-agent:latestA quick breakdown of this command:
--name daestro-agent: This gives the container a recognizable name.-e DAESTRO_AUTH_TOKEN="<AGENT_AUTH_TOKEN>": This sets the authentication token as an environment variable, which the agent uses to connect to Daestro.-v /var/run/docker.sock:/var/run/docker.sock: This gives the agent access to your computer’s Docker socket, so it can run Docker-based jobs.-v daestro_agent_data:/var/lib/daestro-agent: This creates a volume to store the agent’s state data, so it won’t be lost if you restart the container.--network host: This allows the agent to use your computer’s network directly.daestro/daestro-agent:latest: This tells Docker to pull and run the latest version of the Daestro Agent image.
And that’s it! Your personal computer is now an active part of your Daestro setup. You can assign it jobs from your Job Queues just like any cloud server, giving you a powerful and flexible way to get your work done.